That popping or rumbling sound from the utility room is often your water heater telling you it has work to do. Learning how to flush sediment from water heater tanks can help restore quieter operation, improve hot-water performance, and protect a major appliance from unnecessary strain.
For homeowners in Port Orchard and across Kitsap County, sediment is a common maintenance concern, especially in homes with hard water or an older tank-style heater. The material itself is usually a mix of minerals that settle out of the water over time. Left alone, it forms a layer at the bottom of the tank, right where the burner or heating elements need to transfer heat efficiently.
Why Sediment Builds Up in a Water Heater
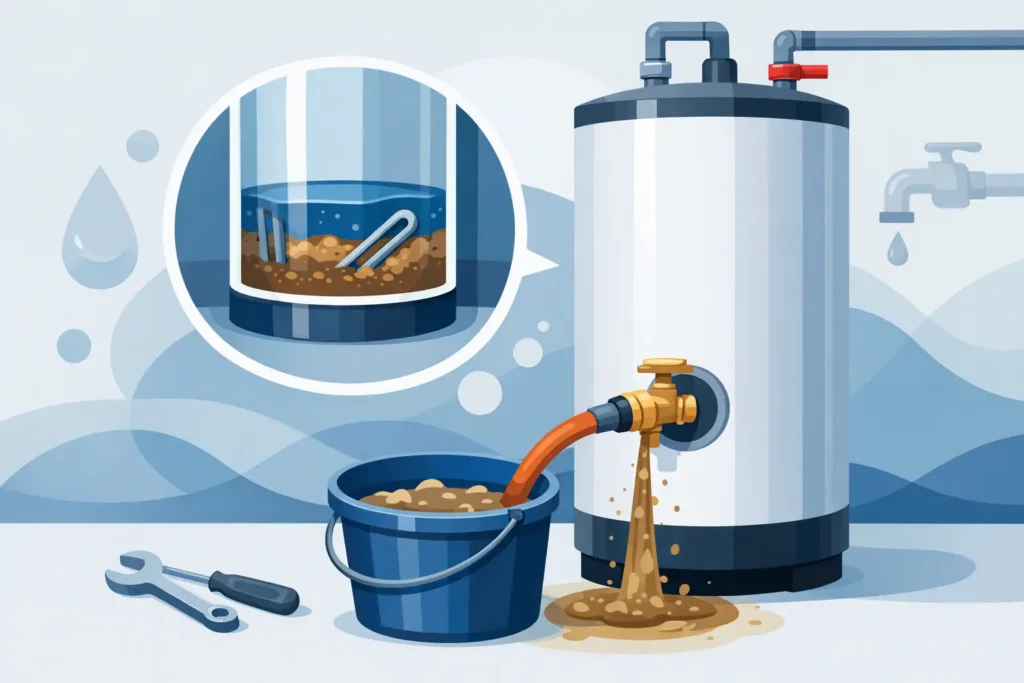
Every time your water heater warms a new tank of water, naturally occurring minerals can separate and settle. Calcium, magnesium, and other fine particles gradually collect at the bottom. A little buildup is normal. Years of buildup can create real problems.
On a gas water heater, the burner has to heat through that mineral layer before it can warm the water above it. That can cause popping, crackling, or a low rumbling sound as trapped water bubbles through the sediment. On an electric model, sediment can cover the lower heating element and make it work harder than it should.
The result may be higher energy use, slower recovery after showers, less usable hot water, or a tank that wears out earlier than expected. Flushing is not a cure for every water heater problem, but it is a sensible maintenance step when the tank is otherwise in good condition.
Signs It Is Time to Flush Sediment From a Water Heater
A yearly flush is a reasonable starting point for many households, though the right schedule depends on water quality, household water use, and the age of the heater. Homes with mineral-heavy water may benefit from more frequent service.
You may be due for a flush if your heater makes popping or rumbling sounds, hot water runs out sooner than it used to, or the water looks rusty when it first comes from the hot side. Sediment can also contribute to temperature swings and reduced efficiency.
Still, do not assume sediment is the only cause. Rust-colored water may point to corrosion inside the tank or worn plumbing pipes. Poor hot-water output can come from a failing dip tube, thermostat, heating element, burner issue, or an undersized heater. If a heater is leaking, smells like gas, has visible corrosion, or produces discolored water consistently, stop treating it as a routine maintenance task and have it inspected.
Before You Start: Know When DIY Makes Sense
Flushing a relatively new, well-maintained tank can be a manageable homeowner task if the drain valve works properly and you have a safe place for the water to go. You will need a garden hose, a flat-head screwdriver if your valve requires one, and access to a floor drain, driveway, or outdoor area where hot water will not damage plants, surfaces, or people.
There are times to leave it to a plumber. An older tank that has never been drained can be unpredictable. Sediment may clog the drain valve, or opening a corroded valve may reveal a leak that was not visible before. A professional can assess whether flushing is worthwhile or whether the tank has reached the point where replacement is the better long-term choice.
Be cautious with a water heater that is more than 10 years old, has a rusty base, leaks around fittings, or has a damaged temperature-pressure relief valve. Those are not maintenance details to ignore.
How to Flush Sediment From a Water Heater Safely
Start by turning off the heater’s energy source. For an electric water heater, switch off the correct breaker at the electrical panel. Never drain an electric tank while its elements are powered, because exposed elements can burn out quickly. For a gas water heater, set the gas control to the pilot setting or turn it off according to the manufacturer’s instructions.
Next, close the cold-water supply valve at the top of the tank. Open a hot-water faucet at a nearby sink or bathtub. This lets air into the plumbing and helps the tank drain. Keep that faucet open while you work.
Attach a standard garden hose to the drain valve near the bottom of the tank. Run the other end to a suitable drainage location. The water may be hot enough to burn, so keep children and pets away from the work area. Make sure the hose is not kinked and that the outlet end cannot move while water is flowing.
Open the drain valve slowly. At first, water may run clear, cloudy, or full of small mineral particles. Let the tank drain until flow slows significantly. If the valve clogs, closing it and briefly reopening the cold-water supply can sometimes dislodge loose material. Do not force a stuck or brittle valve.
Once the tank has drained, open the cold-water supply for short intervals while leaving the drain valve open. This rinses remaining sediment from the bottom of the tank. Continue until the water coming through the hose looks reasonably clear. It does not need to look like bottled water, but it should no longer carry obvious grit or cloudiness.
When finished, close the drain valve firmly without overtightening it. Remove the hose, then fully reopen the cold-water supply. Leave the hot faucet open until water flows steadily without spurting. That step releases air from the system.
Only restore power to an electric heater after the tank is completely full. Check the hot faucet first, then turn the breaker back on. For a gas heater, return the control to its normal operating setting and follow the lighting instructions on the unit if needed.
What a Flush Can and Cannot Fix
A proper flush can reduce sediment-related noise and may help a heater recover hot water more efficiently. It can also prevent loose mineral buildup from becoming a bigger problem. However, it cannot repair a rusted-out tank, restore a failing heating element, or stop an active leak.
If draining the tank produces heavy rust flakes, the drain valve will not close afterward, or water remains discolored after several days of normal use, the problem deserves a closer look. A water heater that leaks from the tank body itself generally needs replacement, not a patch.
There is also a trade-off with severely neglected older heaters. Flushing may improve performance, but moving long-settled material can expose deterioration around the drain valve or inside the tank. That does not mean maintenance caused the failure. It means the tank already had wear that was hidden by time and mineral buildup.
Keep Future Buildup Under Control
Regular maintenance is easier than dealing with a tank full of hardened sediment. Consider checking the heater once a year, including the drain valve area, nearby connections, and the floor around the tank. A small amount of drainage performed routinely is usually far less troublesome than trying to clear years of buildup at once.
Pay attention to changes in sound and performance. A heater that suddenly starts rumbling, takes much longer to reheat, or delivers inconsistent temperatures is worth checking before the inconvenience turns into no hot water at all.
For homeowners who would rather not work around hot water, gas controls, or aging valves, a professional maintenance visit offers peace of mind. Leakless Plumbing can inspect the tank, clear sediment when appropriate, and explain plainly whether the heater is worth maintaining or approaching replacement.
A water heater rarely fails at a convenient time. Addressing sediment while the system is still working gives you more choices, less stress, and a better chance of keeping hot water where it belongs: ready when your household needs it.